Are you an aspiring beekeeper looking to expand your hive and produce even more delicious honey? Look no further! In this article, you will find valuable tips and tricks for successful hive expansion. Discover how to create bigger hives that will lead to better honey production. With these helpful guidelines, you’ll be well on your way to maximizing your beekeeping efforts and enjoying the sweet rewards of your hard work. So put on your beekeeping suit and get ready to learn how to take your hive to new heights!
Choosing the Right Location for Hive Expansion
Expanding your hive is an exciting step in beekeeping, but it’s crucial to choose the right location for your new hive. There are several factors to consider, starting with local regulations and restrictions. Some areas may have specific rules about the number of hives you can maintain or where they can be located, so make sure to familiarize yourself with these guidelines.
In addition to regulations, you should also ensure that the chosen location provides adequate sunlight and shade. Bees need direct sunlight to help regulate the hive temperature, but they also require some shade to protect them from extreme heat. The ideal location should have a good balance of both sunlight and shade throughout the day.
Another essential factor to consider is a water source. Bees need water for hydration and to help cool the hive during hot weather. Make sure there is a reliable source of water near the new hive location. This can be a pond, stream, or even a birdbath filled with fresh water. Just remember to regularly change the water to prevent the growth of bacteria.
Lastly, it’s crucial to maintain a safe distance from human activity. While bees are generally docile creatures, they can become agitated if they feel threatened. Avoid placing the hive too close to areas where people gather, such as play areas or outdoor dining spaces. This will help ensure the safety and comfort of both your bees and those around them.
Selecting the Right Hive Size
When expanding your hive, choosing the right hive size is crucial for the overall health and productivity of your bees. There are a few factors to consider when making this decision.
First, evaluate your current hive’s population. Take note of the number of bees and the amount of brood present. This will give you an idea of whether your hive needs more space to accommodate its growing population.
Secondly, consider future growth. Bee colonies can grow rapidly, so it’s important to plan for potential expansion. If you anticipate significant growth in the near future, it may be wise to choose a larger hive size to avoid overcrowding.
Understanding the different hive sizes available is also vital. Common hive sizes include deep, medium, and shallow supers. Deep supers are typically used for brood rearing, while medium and shallow supers are used for honey production. Be sure to choose a hive size that suits the needs of your bees and your goals as a beekeeper.
Additionally, proper ventilation and insulation are important considerations when selecting a hive size. Bees need proper ventilation to help regulate the hive temperature and prevent moisture buildup. Ensure that the hive you choose provides adequate ventilation and insulation options to create a comfortable and healthy environment for your bees.

Preparing the New Hive
Before Transferring bees to the new hive, it’s essential to properly prepare it to ensure the bees’ well-being and facilitate a smooth transition.
Start by thoroughly cleaning and sterilizing the new hive. This will help eliminate any potential pathogens or pests that may harm your bees. Use a mild bleach solution or a specialized hive cleaning product to clean all the surfaces, including the frames and foundation.
Once the hive is clean, set up the frames and foundation according to the specifications of your hive size. Ensure that the frames are properly spaced and evenly aligned to provide ample room for the bees to build their comb and move freely within the hive.
Next, add essential equipment such as entrance reducers, hive stands, and inner covers. These items are crucial for hive management and will help maintain the hive’s health and security. Make sure they are securely in place before adding bees.
Finally, place the new hive in the chosen location. Remember to follow the guidelines discussed earlier regarding sunlight, shade, water source, and distance from human activity. Position the hive securely, making sure it is stable and protected from strong winds or potential disturbances.
Transferring Bees to the New Hive
Transferring bees to the new hive requires careful planning and execution to minimize stress and ensure their safety. Here are some important steps to follow:
First, choose the right time and weather conditions for the transfer. Ideally, choose a warm, sunny day when the majority of bees are out foraging. This will reduce the number of bees present in the hive during the transfer, making the process easier and less disruptive.
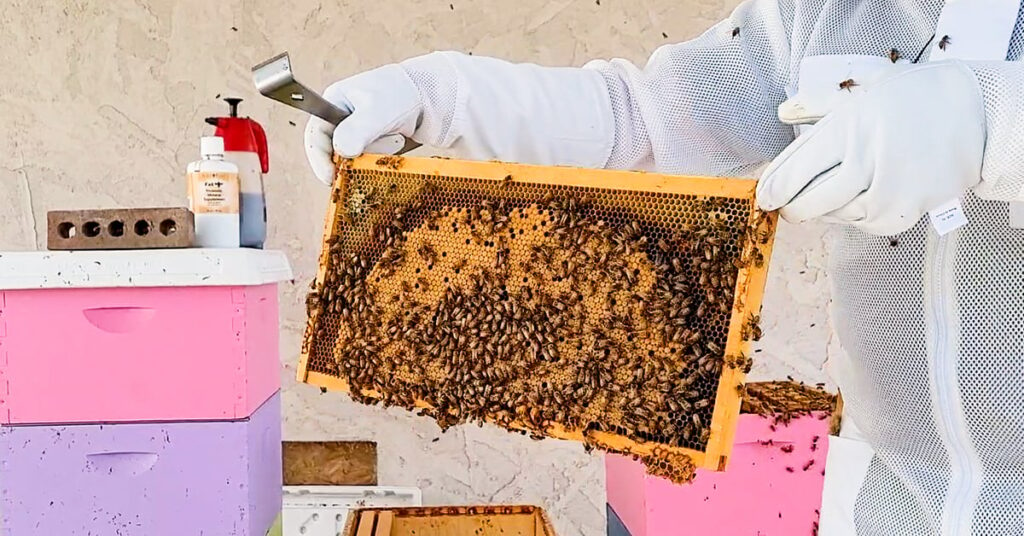
To calm the bees, use smoke. Smoke helps mask the bees’ alarm pheromones and encourages them to gorge on honey, making them less likely to sting or become agitated during the transfer. Use a bee smoker to produce a gentle smoke and apply it to the entrance and around the hive.
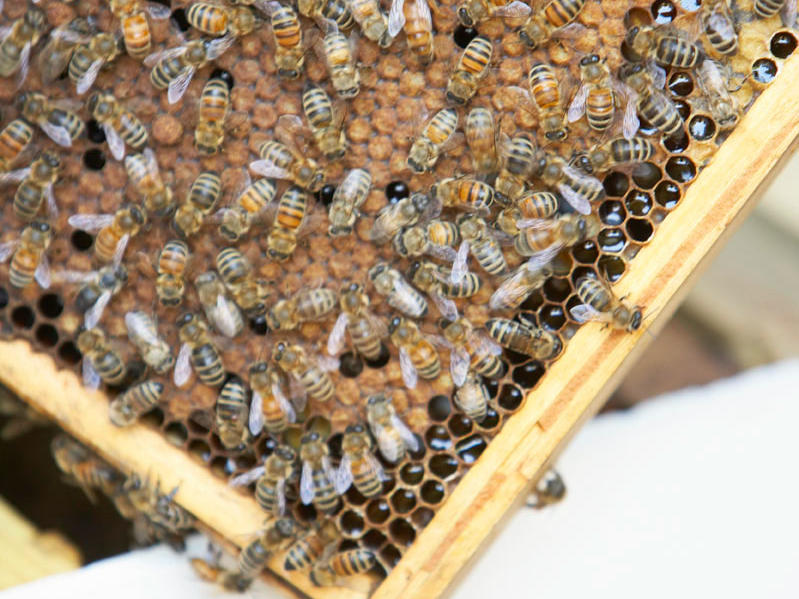
When transferring frames, it’s important to focus on frames with brood (developing bee larvae) and bees. These frames are essential for the hive’s growth and development. Carefully remove the frames from the original hive and place them into the new hive, making sure to maintain their relative positions.
While transferring frames, it’s crucial to ensure that the queen bee is transferred safely. The presence of the queen is vital for the colony’s survival and productivity. Take special care not to damage or lose the queen during the transfer process. If necessary, mark the queen with a small dot of paint for easy identification.

Monitoring and Managing the Hive Expansion
Once the hive expansion is complete, it’s essential to regularly monitor and manage the new hive to ensure its success. Here are some key steps to follow:
Regularly inspect the new hive to assess its health and progress. This includes checking for signs of disease, pest infestation, and proper brood development. Conduct thorough inspections approximately every two to three weeks to stay on top of any issues that may arise.
Monitor population growth to ensure that the hive has enough bees to support its overall functioning and productivity. Pay attention to the number of bees, brood patterns, and the presence of stores such as honey and pollen. If the population seems low, take appropriate measures to boost it, such as introducing a new queen or combining weak hives.
Provide supplemental feeding if needed. Especially during the initial stages of hive expansion, the bees may require additional food sources to help them establish themselves in the new hive. Supplemental feeding can be done by offering sugar syrup or pollen patties, which provide essential nutrients and energy for the bees.
Manage pests and diseases effectively to ensure the hive’s overall health. Regularly check for common issues such as Varroa mites, foulbrood, or wax moths. Implement appropriate treatment methods and practices to control and prevent these problems from spreading.
Splitting an Established Hive for Expansion
Splitting an established hive is a practical method of hive expansion that allows you to create new colonies from a single existing hive. Here’s how to do it effectively:
Start by evaluating the strength and resources of the original hive. Ensure that it is healthy, populous, and has sufficient resources such as honey, pollen, and brood.
Identify a suitable brood box that will serve as the foundation for the new hive. This box should have frames with brood and resources, as well as sufficient space for the colony to expand.
Carefully transfer frames from the original hive to the new hive location, making sure to maintain their arrangement and orientation. The frames should contain brood, nurse bees, and resources to support the new colony’s growth.
Ensure that queen cells are present in the new hive. These cells contain developing queen bees and are essential for the establishment of a new queen in the split colony. If queen cells are not present, you can introduce a queen cell from another hive or purchase a queen from a reputable breeder.

Preventing Swarming during Hive Expansion
Swarming is a natural process in which a bee colony splits to form two or more separate colonies. While this can be beneficial for expanding your hive, it’s important to manage swarming effectively to prevent overcrowding and maintain the overall health of your bees. Here are some tips to prevent swarming:
Recognize swarm indicators such as an increase in bee population, the presence of queen cells, or queen bee changes in behavior. These indicators signal that the hive may be preparing to swarm.
Manage overcrowding and congestion by providing enough space for the bees to expand. Regularly assess the hive population and add additional supers or boxes as needed to accommodate their growth.
Promote queen cell development to prevent the old queen from leaving with the swarm. By allowing the colony to raise new queens, you provide an alternative way for the hive to expand without swarming.
Consider creating artificial swarms by splitting the hive into two separate colonies before the natural swarming process begins. This controlled method allows you to manage the hive’s expansion while preventing the loss of the original queen and maintaining colony strength.
Providing Adequate Food Sources for Expanded Hives
As your hive expands, it’s crucial to ensure that your bees have access to abundant and diverse food sources. Here are some steps to provide adequate food sources for your expanded hives:
Plan for increased forage area by planting bee-friendly flowers and plants in your vicinity. Choose a variety of species that bloom at different times throughout the year to ensure a continuous supply of nectar and pollen for your bees.
Research which flowers and plants are best suited for your geographical region and climate. Native plants are generally a good choice, as they are adapted to the local conditions and support local pollinators.
Supplement your bees’ diet with sugar syrup or pollen patties if natural forage is insufficient or during periods of scarcity. Make sure to use high-quality, unprocessed sugars and avoid feeding your bees artificial sweeteners or other harmful substances.
Ensure access to natural water sources for your bees. Provide shallow containers of fresh water near the hives, such as birdbaths or small ponds. Bees need water for hydration and to regulate the hive temperature, so it’s essential to give them a convenient and clean water source.

Maintaining Hive Health during Expansion
Maintaining hive health is crucial for the overall success of hive expansion. Here are some key practices to keep in mind:
Regularly monitor for signs of disease and parasites. Conduct thorough hive inspections and look for indicators such as abnormal brood patterns, deformed bees, or unusual hive odors. Take prompt action if you suspect any issues and consult with a local beekeeping expert if needed.
Implement proper sanitation practices by regularly cleaning and sterilizing your equipment. This includes hive bodies, frames, and other hive components. Cleanliness helps prevent the spread of diseases and pests and promotes a healthy hive environment.
Provide appropriate ventilation to ensure proper airflow within the hive. Adequate ventilation helps remove excess moisture, prevents overheating, and reduces the risk of condensation, which can lead to mold or mildew growth.
Ensure good nutrition and hive hydration by maintaining adequate food sources and water access, as discussed earlier. Additionally, consider supplementing your bees’ diet with pollen substitutes or supplements if natural pollen is limited or of poor quality.
Harvesting Honey from Expanded Hives
Eventually, the time will come to harvest honey from your expanded hives. Here are some important steps to follow to ensure a successful harvest:
Wait for the right time to harvest, typically when the honey frames are at least 80% capped. Capped honey indicates that it is fully ripened and ready for extraction. Harvesting honey too early may result in high moisture content and reduced shelf life.
Use proper honey extraction techniques to ensure the honey’s quality and minimize stress on the bees. This includes using a honey extractor, uncapping the frames using a hot knife or uncapping fork, and spinning the frames to extract the honey.
Store the harvested honey in suitable containers. Food-grade plastic or glass containers with tight-fitting lids are ideal for preserving the honey’s freshness and preventing contamination. Avoid using metal containers, as they can react with the honey and affect its quality.
Label the containers with the harvest date and hive location to keep track of the honey’s origin and freshness. Store the honey in a cool, dark place away from direct sunlight and extreme temperatures. Proper storage conditions will help maintain the honey’s flavor, texture, and nutritional properties.
By following these comprehensive guidelines for hive expansion, you are setting yourself up for success as a beekeeper. Remember to regularly monitor your hive, provide adequate food sources, and maintain a healthy environment for your bees. With careful management, you can enjoy the rewards of bigger hives and better honey!
